A ten-mile hike is a ten-mile hike, right? Just bring a liter of water, follow the signs on the trail, and you’ll be home in just a few hours, worn out but still ready for a drink with friends in the evening.
Well, maybe. Being unaware of the terrain you’ll be traversing, the elevation gain of the trail, and availability of water are a few factors that might lead to a much more challenging (or easy) hike then you were prepared for.
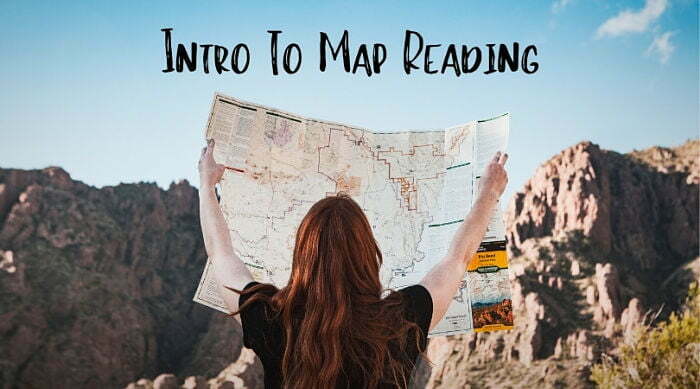
All this information and more is available at a glance to those who can interpret a map. While map-reading might seem like an outdated skill, in reality, it is essential for navigating new terrain – making sure you are not surprised by a lack of water for refilling bottles or by an unexpected several-thousand foot incline. Knowing how to read a map gives a clear picture of important information about hikes that will save you effort and might just save you from dangerous lack of preparedness. Learn more about these topics and others by reading on.
Elevation
Knowing the elevation of the various parts of your hike is important because significant ascents or descents will influence your exertion as well as your time on the trail. This will in turn affect how much time you plan for the hike in addition to how much food and water to pack.
Understanding the elevation on a topographic (or “topo”) map is all about the lines. Maps will usually have amorphous concentric circles here and there made up of several lines which represent hills or mountains. Inside of some of the lines will be numbers representing the elevation – follow that line all over the map and the elevation will be the same. How close together the lines are represents the steepness of a hill – very close together lines means that it is a steep incline, while spread out lines means it’s more gradual. If you see your trail running perpendicular up a group of very-close together lines, be prepared for a tough climb!
Water Sources
Lakes and rivers on maps are always marked in blue. It’s useful for hikers – especially those on long hikes – to know where they can use a water purifier to refill bottles. Some sources recommend drinking about a liter of water per 2 hours of hiking (even more if it’s very hot outside or you are significantly exerting yourself). That means if you’re hiking for eight hours, you would need to carry almost 10 pounds of water unless you bring a water purifier which can weigh as little as 2 ounces to refill along the way.
Knowing how important water is, it’s a good idea to confirm your sources ahead of time. If ever in doubt, call the local ranger station which will be able to tell you if a stream has dried up for the season or is unusable for some other reason.
Scale
Usually located at the bottom of the page, there will be information about how big the area your map represents really is. First, you will find a number with something like 1:10,000 or 1:50,000. This tells you that for each unit on the map (the first number), there are however many units in real life (the second number). So, if 1:10,000, that means that one inch on the map is equal to 10,000 inches in real life. Therefore, a 10,000-scale map shows more detail than a 50,000 map because one inch covers a smaller, more detailed space. A less detailed map (i.e. 1:50,000) can be handy in selecting a hike by showing you a large region to choose from. However, a more zoomed-in map (i.e. 1:10,000) will be best when planning the specifics of your hike because it will show more detail of a certain area.
Distance
Also near the bottom of the map, you will find a thin, black and white checkered bar (usually around 1 or 2 inches long) that represents a set distance, for example 1 mile or 10 miles. This is a tool for roughly measuring distance. Using the ruler section on your compass or a piece of string, measure the length of the bar and then put your sting or compass length on top of the trail on the map so you can see how far a certain part of the trail is if it isn’t labeled. Keep in mind that this is only precise for straight trails – the more squiggles, the more inaccurate the string trick will be (because the trail will be much longer than what the string will “tell” you).
Orientation
Using a compass is extremely useful but also requires a bit of study and practice to become proficient at it. For orienteering beginners, you can utilize your compass by holding it steady until the red arrow stops moving in order to find which direction is north. Then, find the North Arrow on your map and line it up to face the same direction. This allows you to read your map knowing where things ought to be in relation to your current location.
Better Hikes, Better Safety, and Trail Cred
Oh, no! You and your friend are at a crossroads on the trail and don’t know which way to go. But then, you whip out a map and compass and confidently confirm that you ought to take the right-hand turn, after which you will encounter a 400-foot elevation gain while passing a large lake and then continuing for roughly three more miles till the summit. You will instantly gain mad street, er…trail cred and a reputation as one of the coolest hikers around.
Along with making you a highly-sought after hiking partner, your newly-acquired map skills will ensure more comfortable and safer hikes due to the info your map feeds you and allows you to plan for. Whatever your reason for learning to read maps, get to studying today and have a better hike tomorrow.
For more map skills, see our page How to Find a Map Bearing With A Compass.